Big news is coming… Earn college credit through our online arts programs.
Beyond Levels: Four Steps to a Great Mix
The fundamental steps for mixing music that lands with listeners every time.
By Shane Adams, Interlochen Online Course Instructor

A great recording begins with a great performance—but it ends with a great mix. Mixing is a key phase of creating recorded music. During mixing, you adjust the presence and position of each instrument, through adjusting levels, equalization, and panning, and then adding effects—all geared toward supporting the intended emotional message of a song. As you mix, always ask: What effect is the artist trying to create? What is the music asking of the listener? Should the listeners: sing along? dance? think? move? feel something?
With these questions in mind, you can then follow this four-step process to create a great mix:
Step 1. Balance Levels
When balancing levels, start with the most important instrument, then move on to the others in relation to it. For example, a guitar part might be behind the lead vocal in the mix until the guitar solo, when it becomes louder, then becomes quieter when the lead vocal comes back in. In house music, the bass and kick drum need to be prominent, so you’ll want to turn those up in the mix. It all depends on musical style and also your taste.
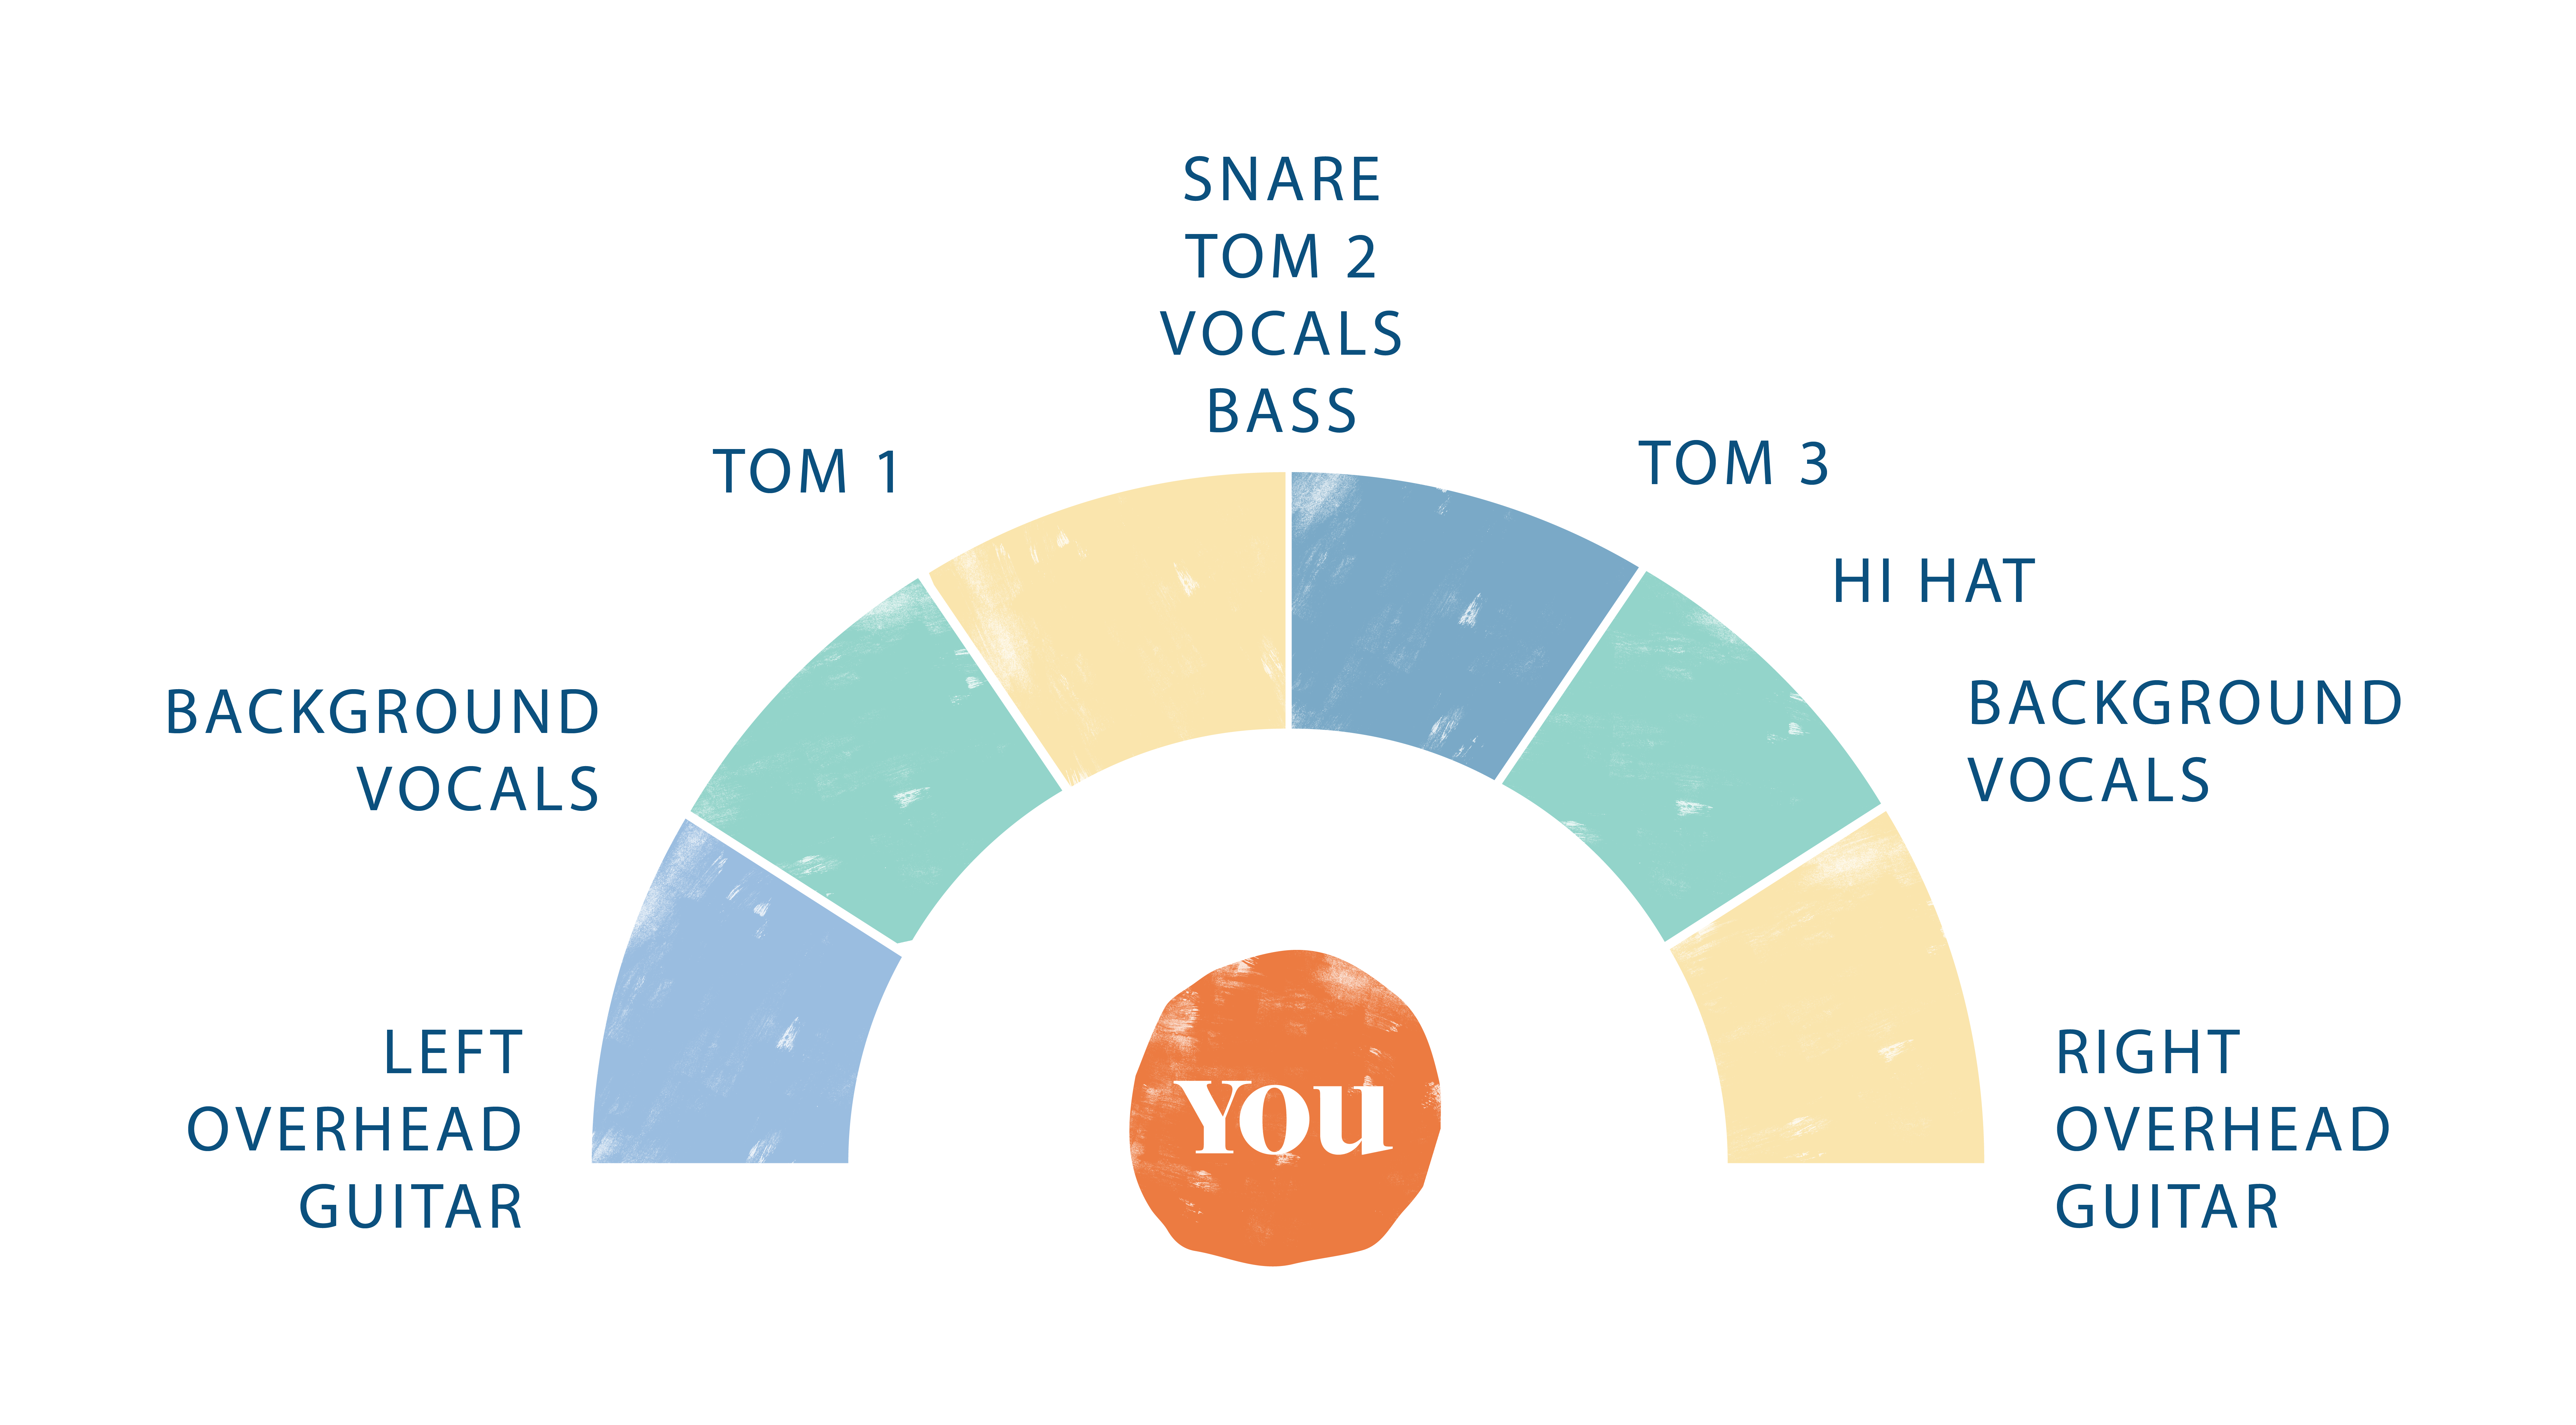
Step 2. Adjust Panning
Panning creates a feeling of left to right “location” on stage. When you go to a live show, the performers are spread out across the stage. The lead vocal is typically in the center, with the other instruments spread out to the left, right, front, and back across the stage. Typically, on stage, their volume is adjusted according to their importance, and we also hear their location based on where they are on stage.
In a mix, we adjust their “locations” using panning. Through panning, you adjust how much of the instrument is heard in the right versus left speaker. This mimics how we hear things in the real world. This gives the illusion that they are in a specific place in front of us from left to right; we call this the stereo field. By placing each instrument at a different place in the stereo field, we carve out a unique place for it in the overall sound. A sound to the right of us will be louder in our right ear; one to our left will be louder in our left ear; and sounds directly in front of us are the same volume in both ears. You can set panning to approximate all of this to create a recording that sounds natural, or if you choose, wild and not natural at all.
Step 3. Adjust Equalization
Equalization (EQ) refers to the frequency range (the highs, mids, and lows) of each recorded part. Some instruments have more high frequencies; others have more lows. We can adjust the frequency range of each instrument individually to give it its own place in the frequency range from low to high, without necessarily having to adjust its level. If two or more instruments overlap in the same frequency range, such as a guitar and a violin, or a kick drum and a bass guitar, you use EQ to cut or boost different frequencies of the two instruments so that they don’t muddy up each other’s sound.
Step 4. Add Effects (FX)
Once your levels, panning, and EQ are set, you can start to add effects. Two of the primary effects you’ll work with include reverb and delay. They help establish depth of field (front to back location) and overall presence in the mix.
Instruments further away will have a little more reverb and delay on them than instruments played close to us. Using different degrees of reverb and delay places something either far forward or far back in the mix. The more of either you add, the further away the sound will be perceived to be. If you want the lead vocals to sound upfront, for example, you would add very little reverb to it. To feel very intimate, as if the singer were playing in a tiny coffee shop right in front of you, you might not use reverb at all.
When you mic an instrument or singer, mic placement has an effect on reverberation as well. The closer the microphone, the less room reverb is captured. The further the mic, the more room sound is captured. Both of these affect whether the performer seems close or far away.
Watch course author Shane Adams create a mix using Cubase digital audio workstation software.
In mixing, we are exercising the science of sound with the finesse of a fine artist’s brush. The sequence above is the order I use in my mixes, but your process may be different. No matter what way you proceed, mixing is a careful and intuitive process. In the end, your ear is the judge, but always keep the artist and the listener first.
Want to continue learning with Interlochen Online?
Find your perfect course now—the next session starts July 13.


Recommended Online Music Production Courses
Each course offers four weeks of instruction and personalized feedback from a professional engineer and producer.
Recording and Producing Music for Beginners
Build and shape what you record into great-sounding music.
Mixing 101
Learn the entire mixing process and apply your skills in ProTools.
Vocal Production
Learn a step-by-step process for recording and editing professional-sounding vocals.
Take all three courses and earn a certificate from a world-renowned institution.
The Music Production certificate program is perfect for...
✔ Adults looking to boost their creative résumé and LinkedIn profile
✔ Teens who want to earn high school credit for their passion
What are students saying?
Students who enrolled in music production courses rated their experience 4.7 out of 5.
How does it work? Sample a course for free.
✔ | Expert Faculty Receive direct, personalized feedback from a professional artist. |
✔ | Real Growth Develop artistic skills that are important to you in 30 days. |
✔ | Collaborate Connect with peers and instructors on your projects—or just for fun. |