Big news is coming… Earn college credit through our online arts programs.
How to Fine-Tune Your Perspective Drawings
Tips on how to draw realistic 3D perspectives on a flat surface.
By Conor Fagan, artist and Interlochen Online course instructor

Perspective drawing is a tried and tested set of rules that helps you create a realistic sense of 3D space in your drawing. If you follow these rules—which artists have been using successfully for more than 800 years—you’ll end up with an impressive drawing every time, no matter your skill level. All you need is a ruler and a pencil. Keep your pencil sharp and your ruler on your vanishing points, and you can’t go wrong.

One-Point Perspective
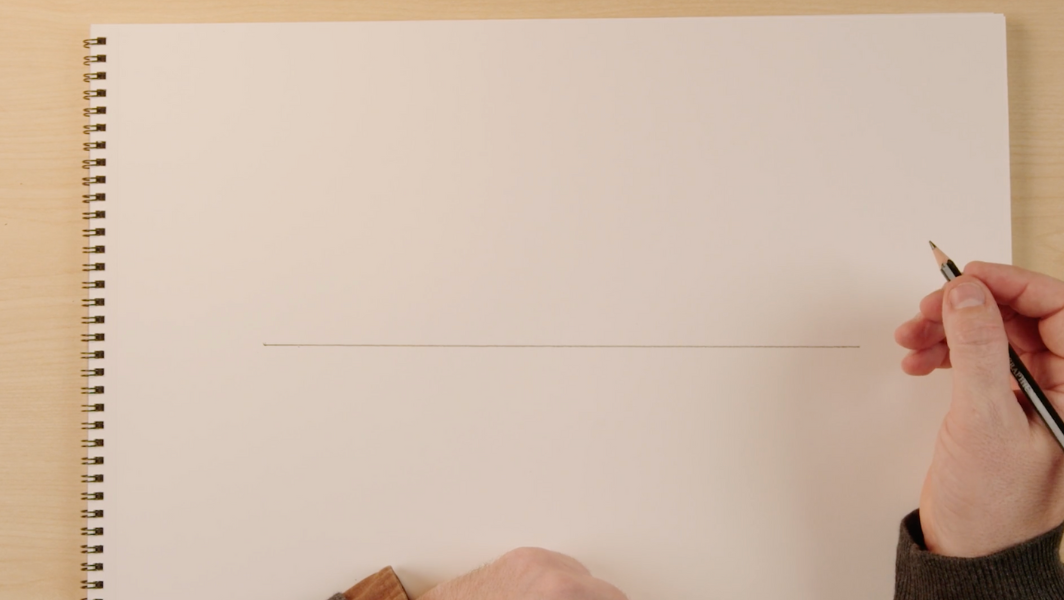
- All perspective drawings operate in relationship with the horizon. To begin, establish your ground plane. Using your ruler, draw a horizon line about two-thirds of the way up the page.
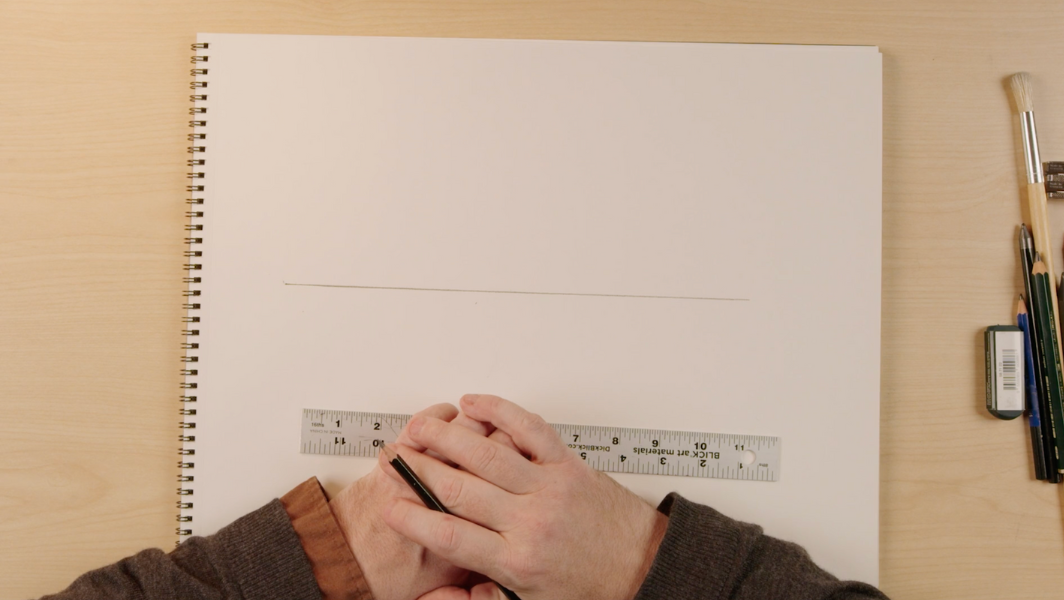
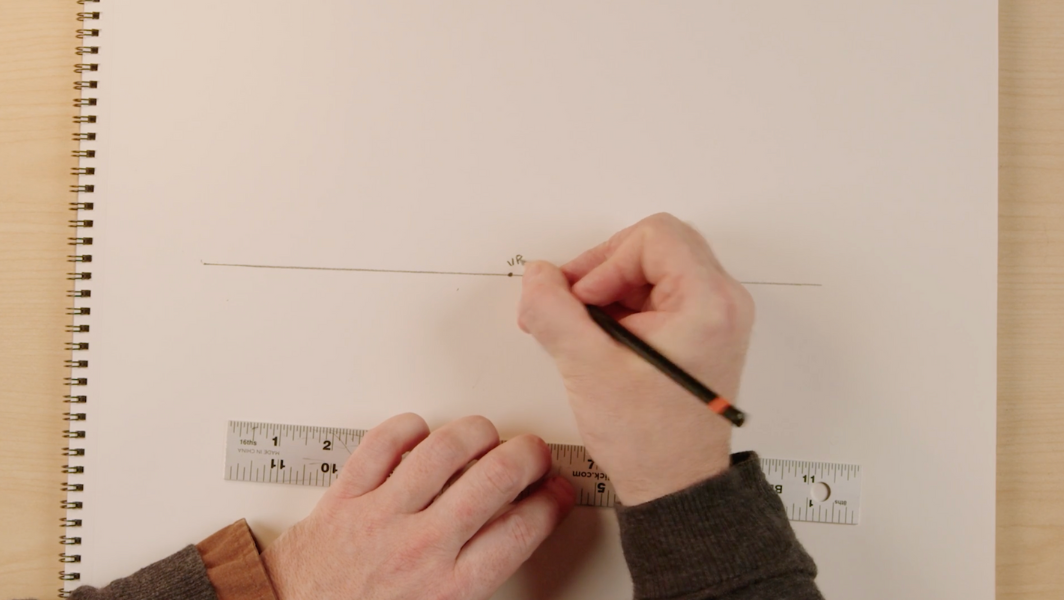
- Once you establish the ground plane with a horizon line, establish a single vanishing point. This is the point towards which all the objects on the page vanish.
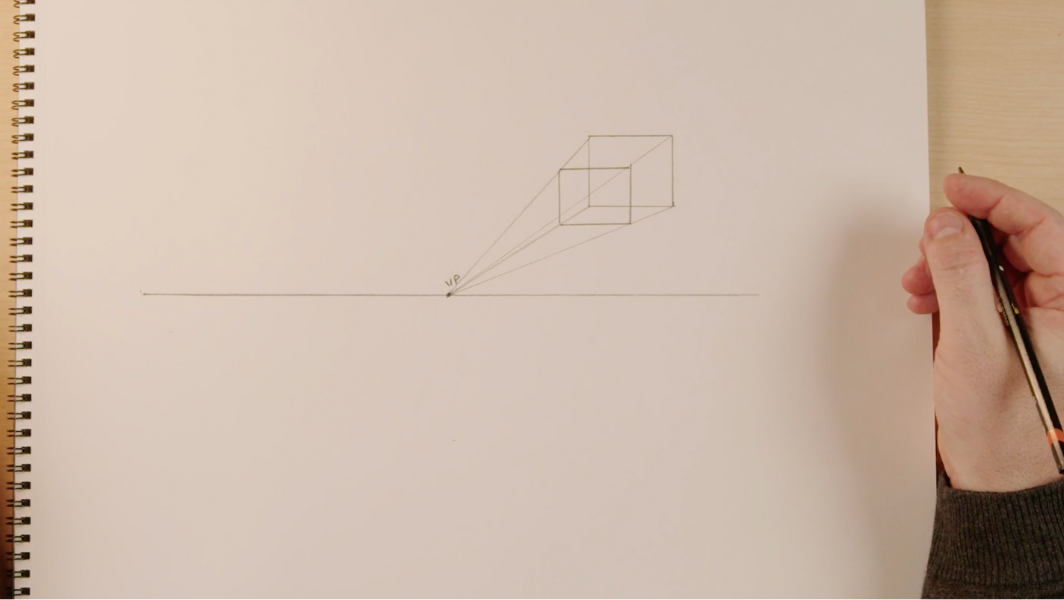
- A good object to start with is a cube, which we begin by drawing a square. You can draw this square anywhere on the page, but for now, draw the square above the horizon line, towards the center of the page.

- From here, connect each point of the square to the vanishing point, being careful to be as accurate as possible.
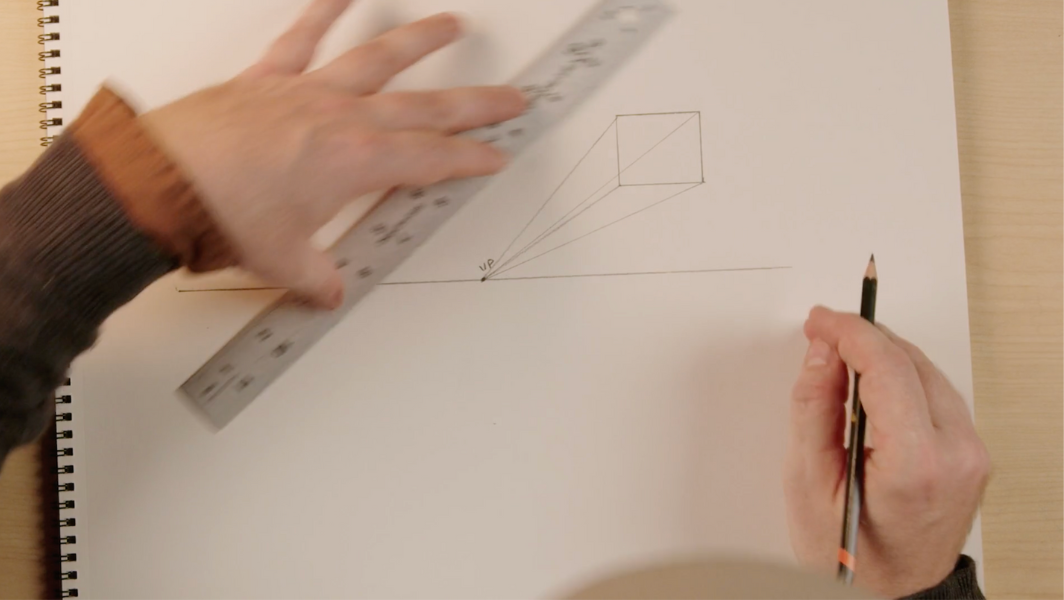
- Last, finish the cube by drawing the back of the square using parallel lines to the front sides.
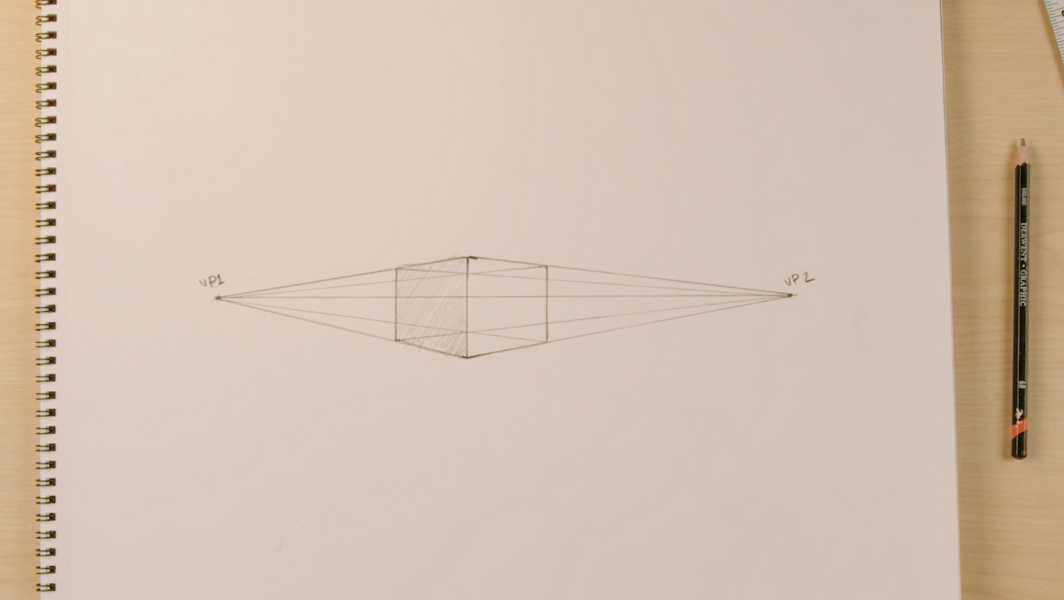
Two-Point Perspective
This form of drawing is almost exactly the same as a one-point perspective drawing except for one important difference: two vanishing points!
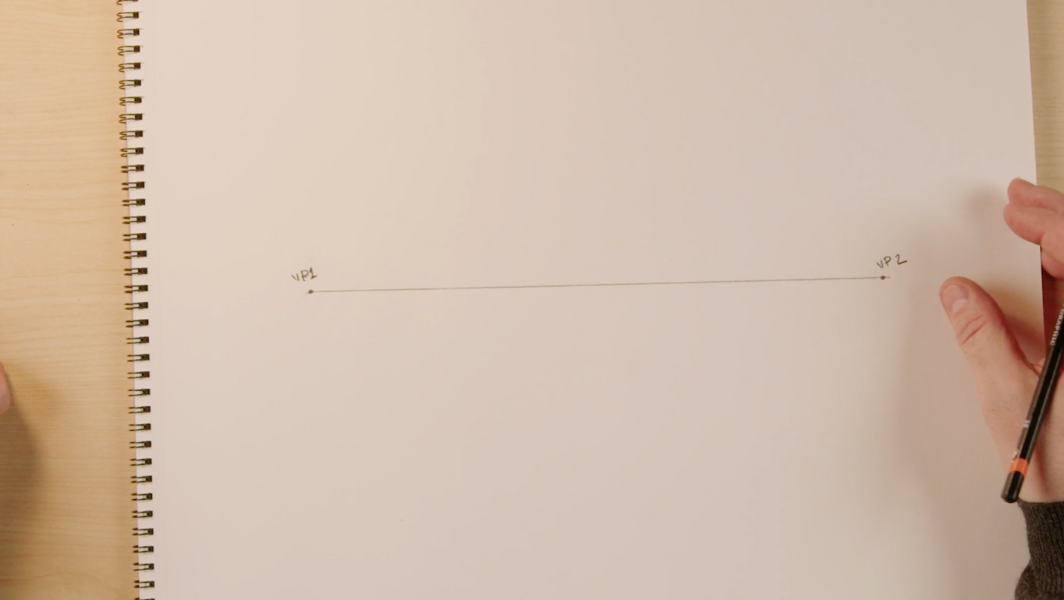
- Following the same set of rules, begin by drawing a horizon line.
- From here, as far to the left and right as possible, draw your vanishing points, labeling each VP1 and VP2
- Begin to map your object. This time, start with a simple line. We do this because in two-point perspective, the edge of the cube will always be the closest point to us.
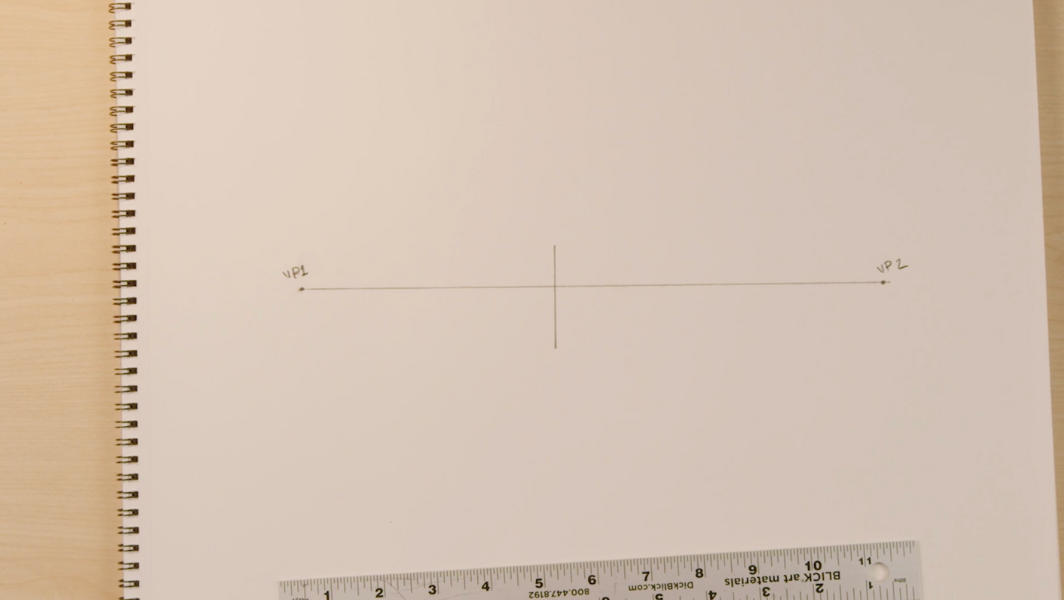
- From here, connect the central line to both vanishing points at the top of the line and at the bottom.
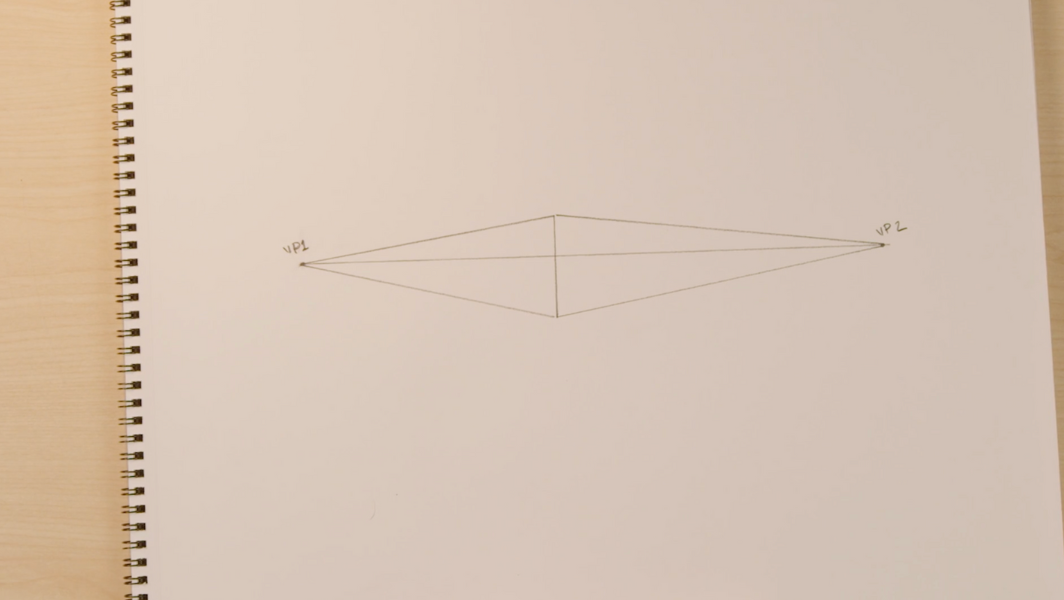
- On either side of the original line, decide where your shape ends. Do this by drawing two vertical lines: one to the right, and one to the left of our original vertical line.
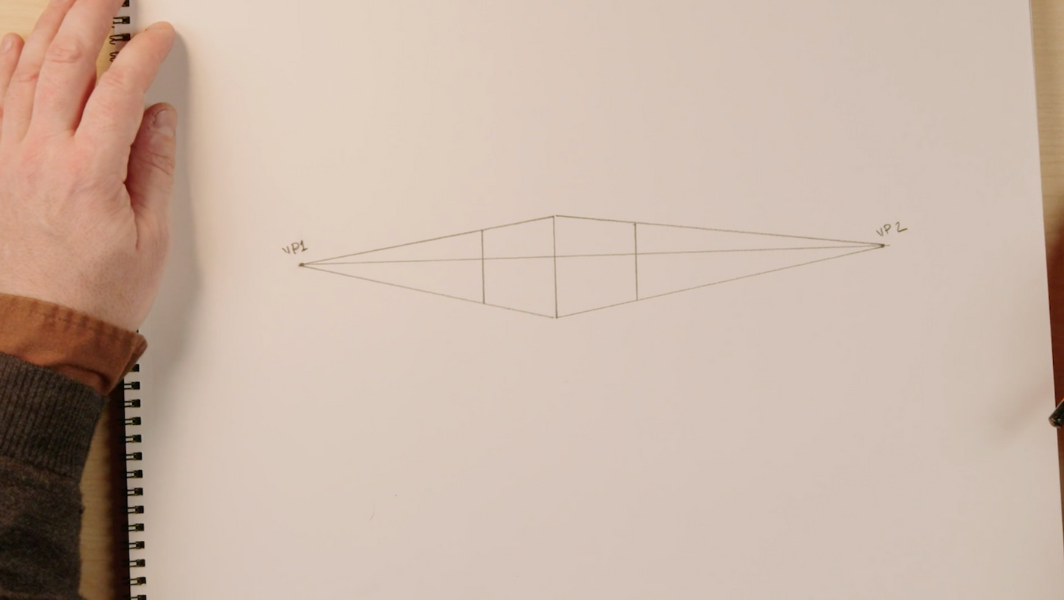
- From here, connect the tops and bottoms of your new lines to the opposite vanishing points on the page.
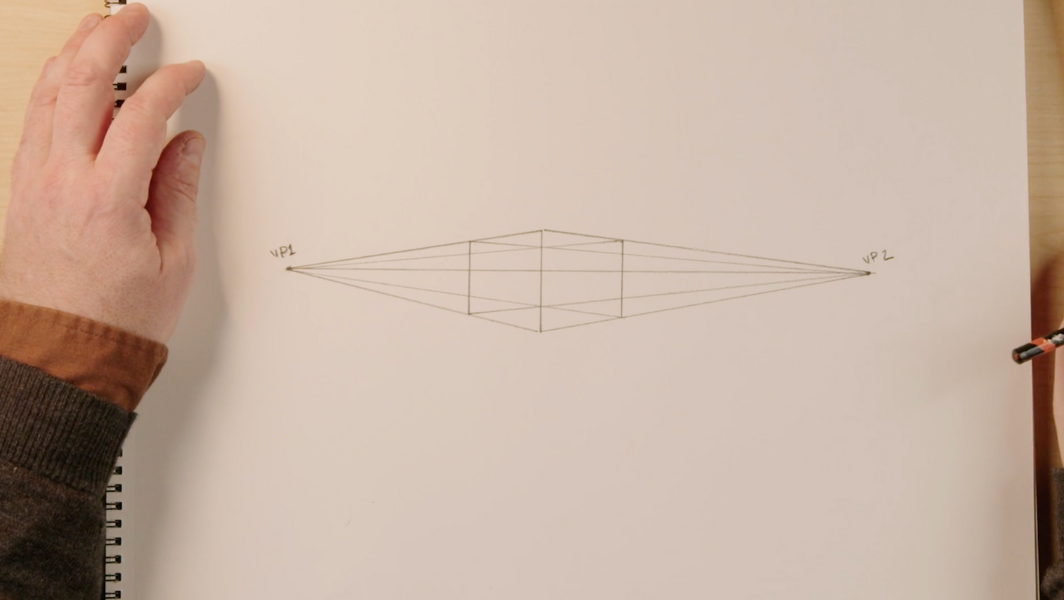
- To finish, connect all adjacent points to their opposite vanishing points, and accentuate the important vertices.
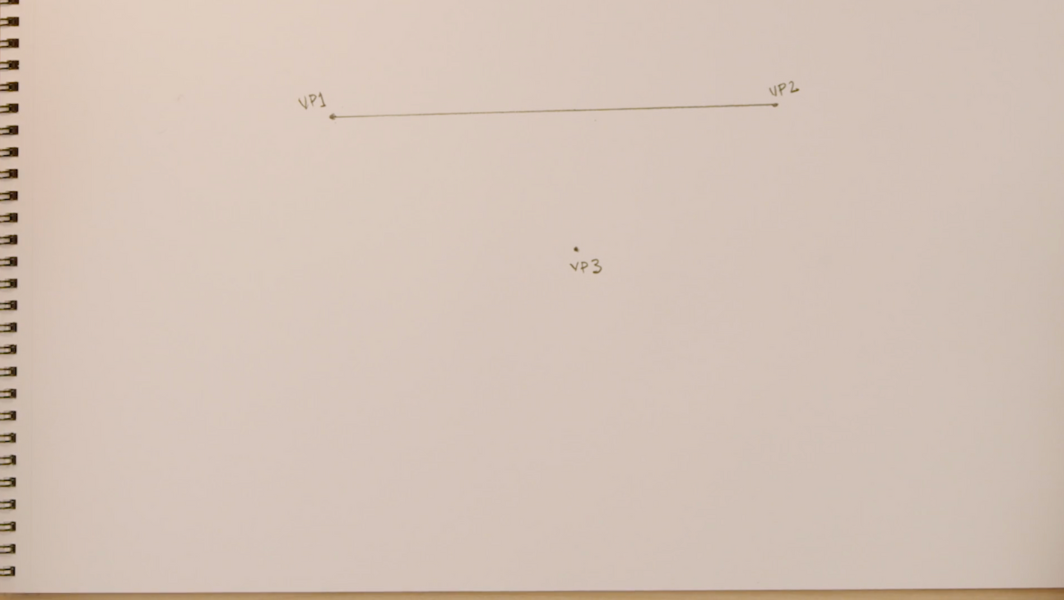
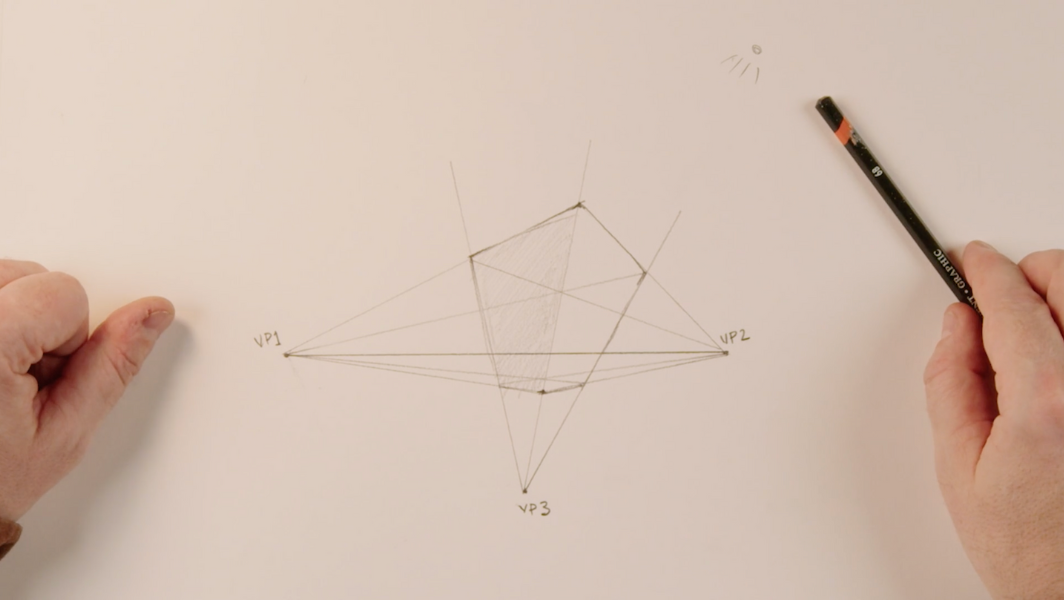
Three-Point Perspective
Three-point perspective is used when drawing an object from high above or from far below, such as in this drawing.
- For a three-point perspective drawing, make sure to keep your drawing contained to the middle of the page. This is because if you go too far to the left, right or top, the object will begin to warp. Start by drawing the horizon line.
- Next, draw three vanishing points: two to the left and right, and one more below the horizon line like this.
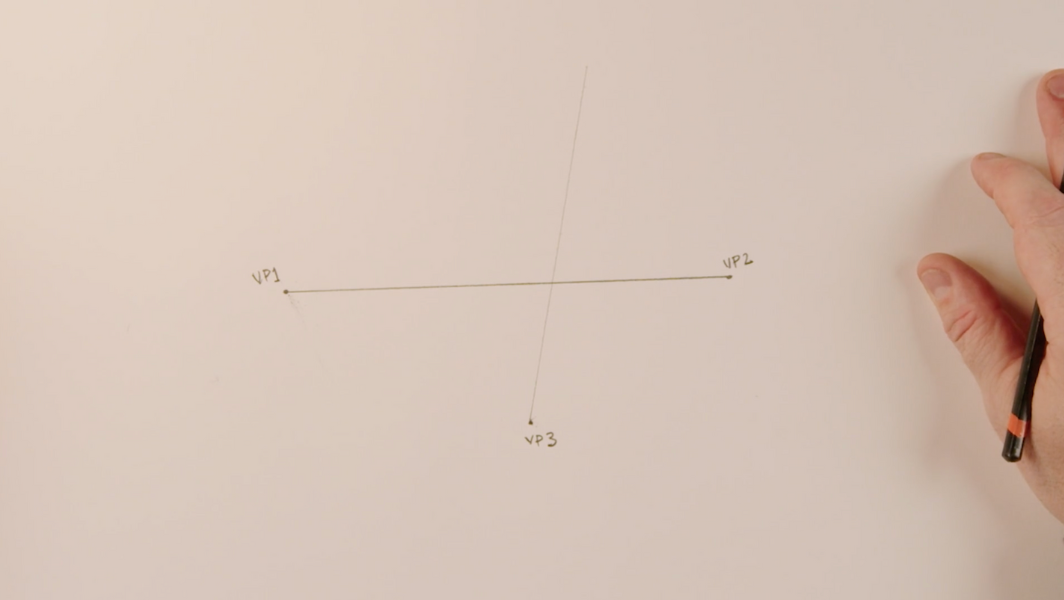
- From here, draw a line from the third vanishing point up and through the horizon— either slightly left or slightly right of center.
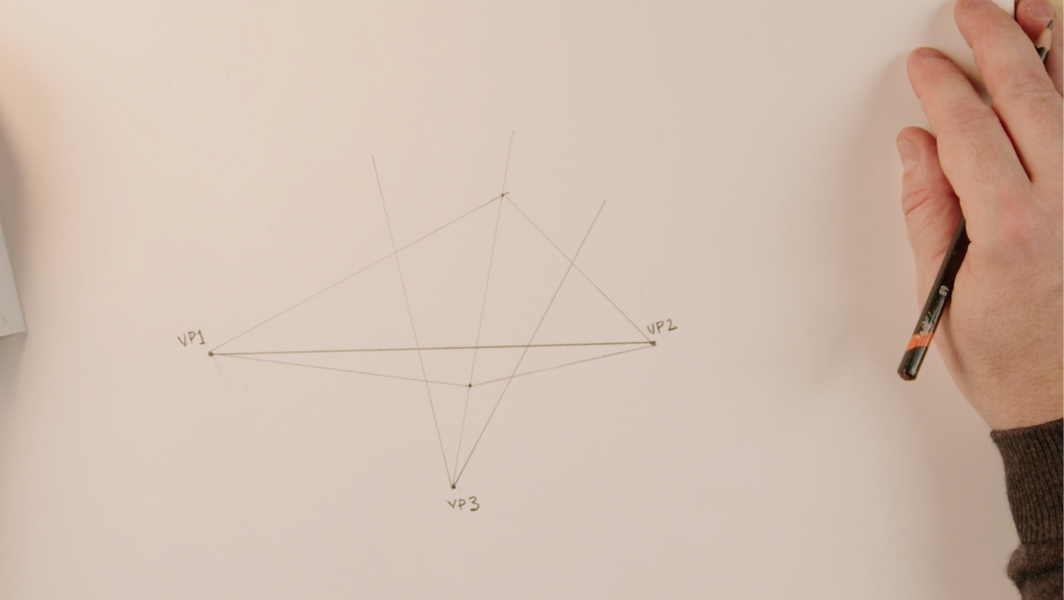
- Once the first line is established, connect the first and second vanishing points to the middle line at the top and bottom.

- Once again, draw two lines: one to the left and one to the right of the first line emanating from the third vanishing point.
- Connect all points to the remaining vanishing points to complete the shape.
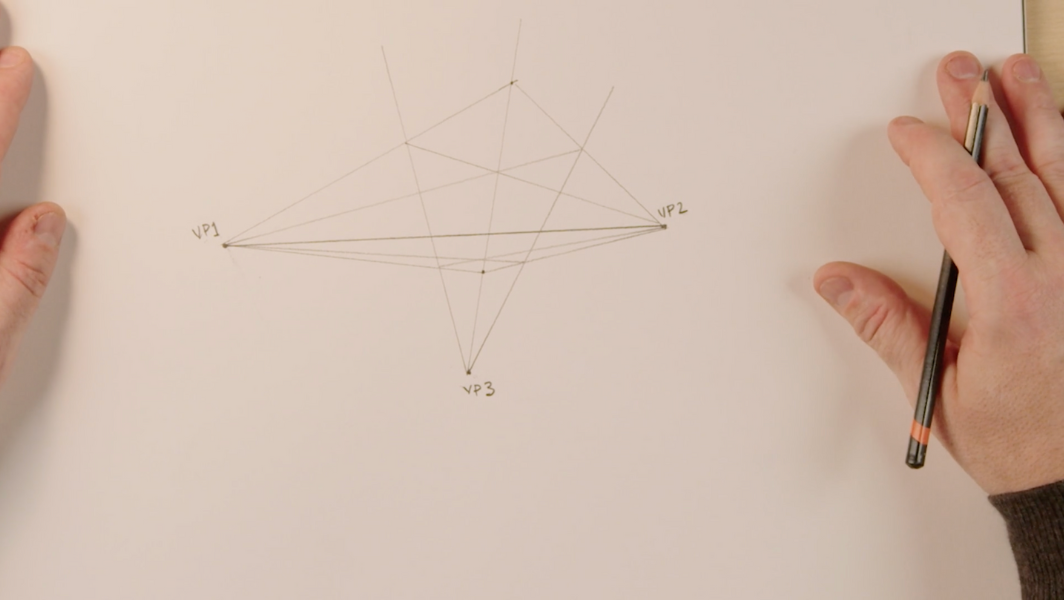
- Finally, accentuate the vertices that are frontward facing and shade in sections that would be less visible to light.
Want to continue learning with Interlochen Online?
Find your perfect course now—the next session starts July 13.


Recommended Drawing Courses
Each online drawing course offers four weeks of instruction and personalized feedback from a professional artist.
Drawing Basics
Build foundational drawing skills step by step.
Introduction to Figure Drawing
Draw the human form with accuracy and expression.
Introduction to Portrait Drawing
Capture lifelike human expressions and emotion.
Take all three courses and earn a certificate from a world-renowned institution.
The Drawing Fundamentals certificate program is perfect for...
✔ Adults looking to boost their creative résumé and LinkedIn profile
✔ Teens who want to earn high school credit for their passion
What are students saying?
Students who enrolled in drawing courses rated their experience 4.6 out of 5.
How does it work? Sample a course for free.
✔ | Expert Faculty Receive direct, personalized feedback from a professional artist. |
✔ | Real Growth Develop artistic skills that are important to you in 30 days. |
✔ | Collaborate Connect with peers and instructors on your projects—or just for fun. |